Your ticket to a seamless and stress-free journey.
Dreaming of your next getaway, but the thought of navigating an airport with your electric wheelchair feels more like a nightmare than a vacation? You’re not alone. The excitement of travel can quickly be overshadowed by a mountain of questions and worries. What are the rules for my battery? Will the airline staff know how to handle my chair? What if it gets damaged? It’s enough to make you feel grounded before you even take off.
But don’t unpack your bags just yet! This guide is your ticket to a stress-free travel day. We’re here to demystify the rules, decode the battery puzzle, and walk you through every step, from your front door to the airplane and back again. Forget the anxiety and focus on the adventure ahead. With a little preparation, you can protect your ride and travel with total confidence. Ready to roll? Let’s get you prepped for takeoff.

The Golden Rule: Talk to Your Airline First!
If you take only one piece of advice from this entire guide, let it be this: contact your airline as early as possible. I’m talking about the moment you book your ticket, or at the very least, a minimum of 48 hours before your flight.
Why is this so crucial? Every airline has slightly different mobility device policies. Calling them is your first and most important step. When you call, you’ll want to make a special assistance request. This isn’t just about getting help through the airport; it’s about officially notifying them that you’re traveling with a power chair on an airplane.
During this call, be ready with the following information:
- The make and model of your electric wheelchair.
- Its dimensions (height, width, and length) and weight. This is critical because they need to ensure it will fit through the cargo hold door.
- The type of battery your chair uses (we’ll dive deep into this in a moment).
This initial conversation sets the stage for everything else. It puts your needs on the airline’s radar and allows them to prepare their staff. Ask them to add the details to your reservation and request a confirmation email. This piece of paper is your proof that you’ve done your due diligence.
Know Before You Go: A Quick Look at the Key Regulations
Navigating the world of airline regulations for electric wheelchairs can feel like alphabet soup, but there are a few key players you should know. These rules are in place for your safety and the safety of everyone on board.
The most important law on your side is the Air Carrier Access Act (ACAA). This is a U.S. law that makes it illegal for airlines to discriminate against passengers with disabilities. It mandates that they must provide assistance and transport your mobility device, free of charge. This applies to all flights to, from, and within the United States.
Internationally, regulations are guided by the International Air Transport Association (IATA), which sets the standards for Dangerous Goods Regulations. Since wheelchair batteries fall into this category, these are the rules most airlines worldwide follow. In the U.S., the Federal Aviation Administration (FAA) sets similar rules.
Don’t worry, you don’t need to memorize these rulebooks. The key takeaway is that your right to fly with your wheelchair is protected, but you must follow the safety procedures, especially regarding batteries.
The Battery Puzzle: Your Complete Guide to Traveling with Power
Okay, let’s tackle the biggest source of confusion: your wheelchair’s battery. This is the part that gets the most scrutiny from airlines, and for good reason. Battery safety is a top priority. The primary goal is to prevent a short circuit during the flight.
There are three main categories of batteries, and how you handle them depends entirely on which type you have.

Is Your Battery Lithium-Ion? Here’s Your Game Plan
Lithium-ion batteries are common in modern, lightweight, and foldable design wheelchairs. They are powerful and efficient, but they are also subject to the strictest rules due to their high energy density.
FAA and IATA rules for lithium-ion batteries are very specific:
- If the battery can be removed: You must remove it. The battery must then be carried with you into the cabin as carry-on baggage. You cannot leave it in the wheelchair, and it cannot go in your checked luggage.
- Protect the Terminals: The removed battery’s terminals must be protected to prevent a short circuit. You can do this by putting tape over the terminals or placing the battery in a protective pouch or its original packaging.
- Watt-Hour (Wh) Limits: This is the magic number.
- One battery up to 300 Wh is permitted.
- If your chair requires two batteries, each one can be up to 160 Wh.
- You are also allowed one spare battery up to 300 Wh or two spares up to 160 Wh each. Spares must also be carried on and protected.
Crucial Note: If your battery is over 300 Wh, you may not be able to fly with it on a passenger aircraft. You would need to ship it via a cargo airline that has a “Dangerous Goods license.” This is rare for wheelchairs but is essential to know.
What About Non-Spillable or Spillable Batteries?
These are typically heavier, sealed lead-acid (SLA) batteries. The rules are a bit different.
| Battery Type | Common Names | Airline Handling Rules |
|---|---|---|
| Non-Spillable | Sealed Lead Acid (SLA), Gel Cell, Absorbed Glass Mat (AGM) | The battery can usually remain in the wheelchair. Airline staff will disconnect the terminals and secure the battery to prevent it from shifting. You must ensure the battery is securely housed in a protective housing. |
| Spillable | Wet Cell | These are becoming less common but require the most special handling. The battery must be removed from the wheelchair, kept upright at all times in a special, airline-provided battery box, and loaded carefully. Some airlines refuse to transport them. |
How do you know which you have? Your chair’s owner’s manual is the best place to check. If you can’t find it, look for labels on the battery itself that say “non-spillable,” “AGM,” or “gel.”
The Magic Number: How to Find (or Calculate) Your Battery’s Watt-Hours (Wh)
For lithium-ion batteries, the Watt-hour rating is everything. Sometimes it’s printed right on the battery. If not, don’t panic! You can calculate it easily if you know the Voltage (V) and Amp-hours (Ah), which are almost always listed.
The formula is simple:
Voltage (V) x Amp-hours (Ah) = Watt-hours (Wh)
For example, if your battery is 24V and 10Ah:24V * 10Ah = 240Wh
This number is below the 300Wh limit, so you’re good to go! Having this calculation ready for the airline staff can save a lot of time and potential confusion at check-in.
Your Paperwork Power-Up: The Ultimate Document Checklist
Being prepared with the right documents can make the difference between a smooth check-in and a stressful delay. I like to keep everything in a single, clearly labeled folder that I can hand to the airline staff.
The Must-Haves:
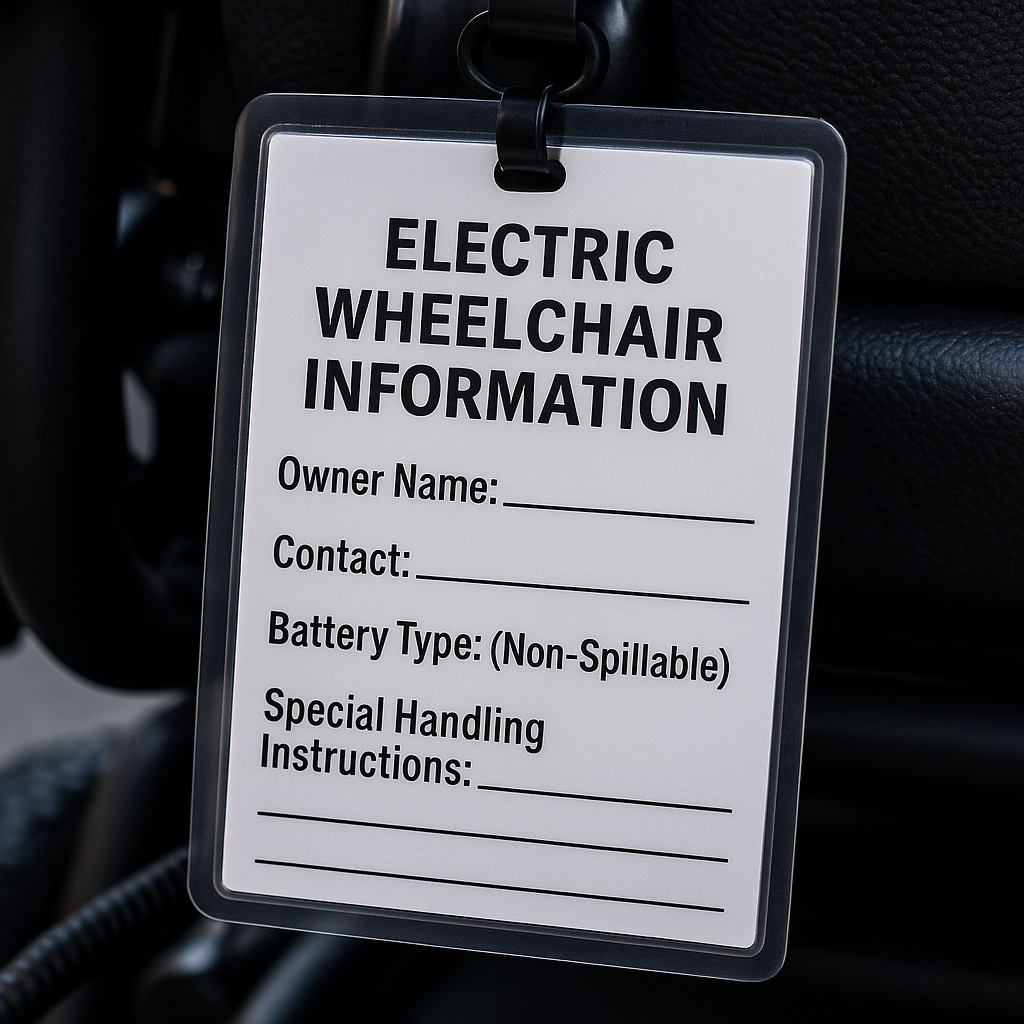
- Wheelchair Information Sheet: Create your own one-page summary. Include the make, model, weight, dimensions, and a color photo of your chair.
- Battery Information: This is vital. Include the battery type (e.g., “Lithium-Ion, Removable”), the Watt-hour (Wh) rating, and the calculation you used. For lithium batteries, it’s a great idea to have the manufacturer’s specification sheet or a copy of its UN38.3 test report or Material Safety Data Sheet (MSDS), which proves it has been tested for safety.
- Owner’s Manual: Bring a copy of the manual, especially the pages showing the battery removal and disassembly instructions. You can’t assume the ground crew knows how your specific chair works.
Good to Have:
- Doctor’s Note: While not always required by airline regulations, a note from your doctor explaining the medical necessity of your electric wheelchair can be helpful, especially for international travel.
- Pre-Approval Confirmation: That email confirmation you got from the airline? Print it and bring it with you.
One Week to Go: Prepping Your Wheelchair at Home
With your flight a week away, it’s time to get your chair physically ready. A little pre-flight preparation now prevents headaches later.
Protect Your Ride: How to Safely Prep and Pack Loose Parts
Your electric wheelchair is a complex piece of medical equipment, and it’s not designed to be tossed around like a suitcase. The goal is to make it as compact and durable as possible for its journey in the cargo hold.
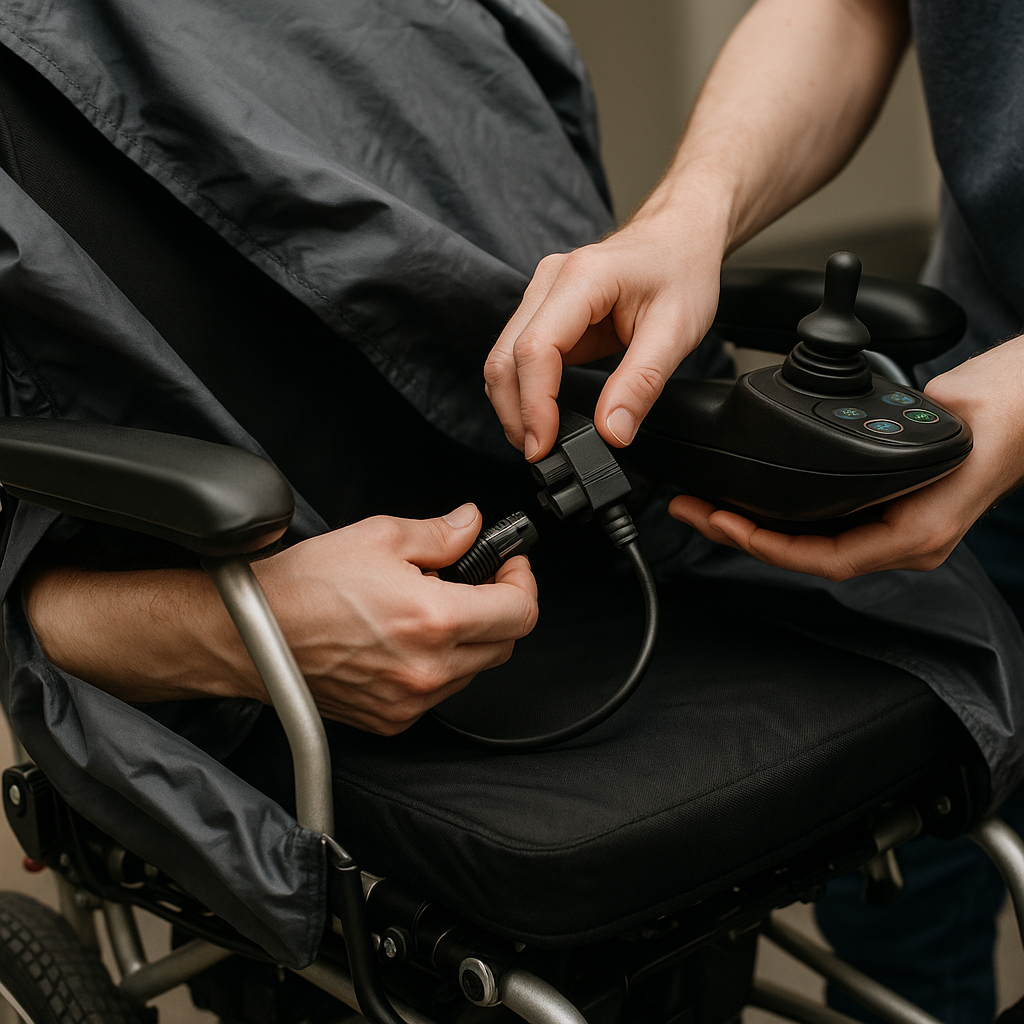
- Remove All Loose Parts: Anything that can easily pop off should be taken off. This includes the joystick, seat cushion, headrest, footrests, and any bags or pouches.
- Pack Them in Your Carry-On: I can’t stress this enough. Pack these loose parts, especially the fragile joystick, in your carry-on bag. This does two things: it protects them from damage and ensures you don’t lose them. Don’t forget any special tools needed for reassembly post-flight.
- Secure What’s Left: If there are parts you can’t remove, secure them with zip ties or bungee cords. Make sure the power is off and the chair is in freewheel or neutral mode to make it easier for staff to move. Consider a waterproof cover for extra protection against the elements if it sits on the tarmac.
Label Like a Pro: Why Clear Instructions Are Your Best Friend
Imagine being a baggage handler faced with a complex, expensive piece of equipment you’ve never seen before. Clear, simple labels are your way of communicating directly with the people handling your chair.
Use brightly colored tape or tags and write in large, clear letters. Attach labels to your chair with instructions like:
- Your Name, Phone Number, and Address
- “FRAGILE – MEDICAL EQUIPMENT – DO NOT TILT”
- “Handling Instructions Inside Pocket” (where you’ve placed your document folder)
- “Place Removed Joystick in this Bag” (if you have a dedicated spot)
- “This chair weighs [X] lbs”
Take a “Before” Photo (You’ll Thank Me Later!)
Just before you head to the airport, take several photos and a short video of your wheelchair from all angles. Document its current condition, including any pre-existing damage. This is your indisputable evidence if you need to make a damage claim with the airline later. Email the photos to yourself so they are time-stamped.
Airport Day: Your Step-by-Step Guide from Curb to Gate
The day has arrived! Plan to arrive at the airport earlier than you normally would. I recommend at least 2-3 hours before a domestic flight and 3-4 hours for an international one. This extra time is a buffer for any unexpected issues.
Checking In: Making a Great First Impression
When you get to the check-in desk, immediately inform the agent you have an electric wheelchair that needs to be checked. This is where your preparation pays off. Hand them your folder with all the wheelchair and battery information. A confident, organized approach shows them you know the drill and makes their job easier.
They will tag your chair. You have two main options for what happens next:
- Check it at the counter: You transfer to an airport wheelchair here.
- Gate-check it: You ride your own chair through security to the gate. This is what I always recommend. It gives you your independence for as long as possible and reduces the chance of mishandling.
Smooth Sailing Through Security: What to Expect from the TSA
Navigating TSA guidelines for mobility devices is usually straightforward. You will not be asked to get out of your wheelchair if you are unable to. The TSA officer will perform a manual pat-down and may swab your hands and parts of the chair for trace explosives. It’s a standard procedure. Your carry-on bag containing the battery and joystick will go through the X-ray scanner like any other bag.
At the Gate: The Final Hand-Off Before Boarding
Once at the gate, check in with the gate agent. Remind them that you will be gate-checking your chair and confirm your request for pre-boarding. This allows you to transfer to the aisle chair (a narrow wheelchair that fits down the airplane aisle) and get to your seat before the rush.
This is the moment of truth: the final hand-off. The ground crew will come to the jet bridge to take your chair down to the cargo hold. This is your last chance to communicate.
- Show them the joystick is removed.
- Point out your handling labels.
- Briefly explain any quirks, like how to put it in freewheel mode.
- Remind them you need it brought back up to the jet bridge upon arrival, not sent to baggage claim.
You’ve Landed! Now What?
Congratulations, you made it! But the journey for your wheelchair isn’t quite over.
The Reunion: Getting Your Wheelchair Back Safe and Sound
As you deplane, remind the flight attendant that your wheelchair should be brought to the jet bridge. It’s common practice for mobility devices to be the first items unloaded, but it doesn’t hurt to remind them. Be prepared to wait a little; it can take 15-30 minutes for them to bring it up from the cargo hold.
Once it arrives, take a moment before you transfer back into it. This is critical.
Damage Control: What to Do if Something Goes Wrong
Do a thorough inspection right there at the gate. Check for any new scratches, dents, or broken parts. Test the power and controls. Compare its condition to the “before” photos on your phone.
If you find damage:
- Do not leave the airport.
- Document everything. Take photos of the new damage immediately.
- Find an airline representative and ask to speak to the Complaint Resolution Official (CRO). This person is trained in disability regulations and is your best resource.
- File a damage report right then and there. Get a copy of the report and the agent’s name.
Under the ACAA, airlines are responsible for repairing or replacing damaged mobility devices. But your case is much stronger if you report it before you go home. This is where having travel insurance that specifically covers your medical equipment can also provide peace of mind.
Final Thoughts: You’re Ready to Roll
Flying with an electric wheelchair for the first time can feel like a monumental task, but it is absolutely achievable. The key to a successful and low-stress journey is knowledge and preparation. By understanding the airline regulations, communicating clearly, and taking the time to protect your chair, you are taking control of the process.
You are your own best advocate. Don’t be afraid to speak up, ask questions, and insist on the assistance you are entitled to. Now that you’re armed with this guide, you can shift your focus from worrying about the “how” to dreaming about the “where.”
Thank you for reading. Your next adventure awaits!